Vehicles & Operations
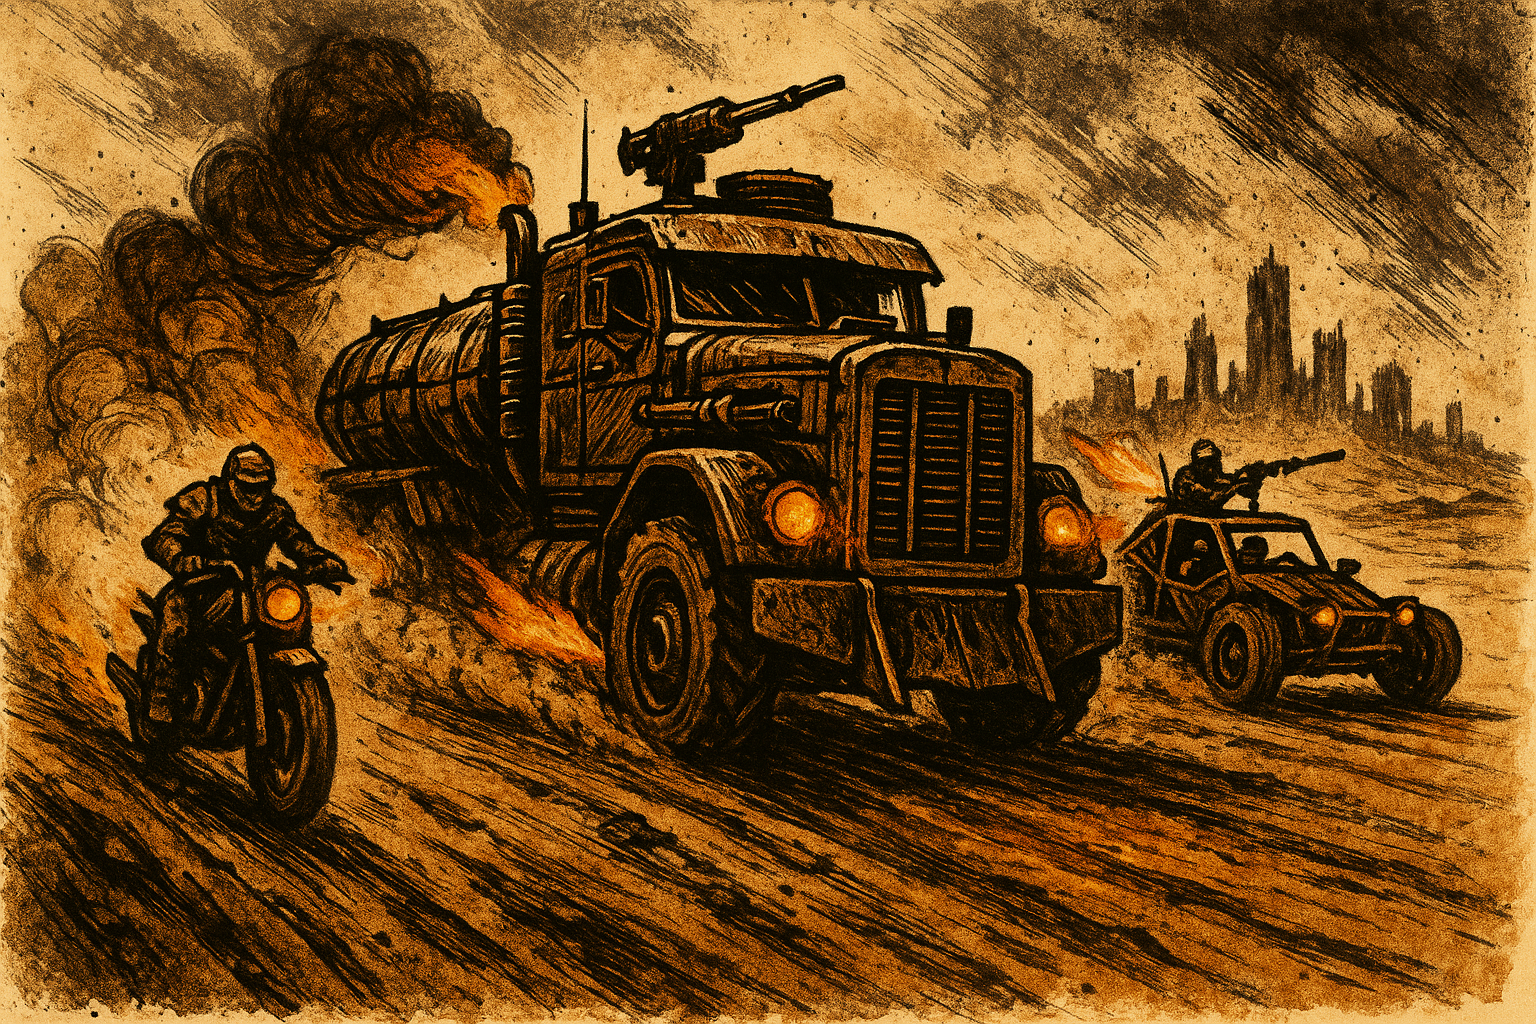
Vehicles are the lifeline of the post-apocalyptic world. Settlements trade across hundreds of miles of blasted wasteland, patrols protect borders from mutant incursions, and salvage crews delve into pre-war ruins that no one can reach on foot. A party without vehicles is a party that walks — and in the Ashfall, walking is dying slowly.
This chapter covers everything from driving a jury-rigged motorcycle through a raider ambush to commanding a crew aboard a pre-war warship. Vehicle combat uses the same 3-action economy as personal combat, with each crew member contributing through their specialized role.
Vehicle Fundamentals
Size Classes
Every vehicle has a size class that determines its base statistics, crew capacity, station layout, module slots, and compartment capacity.
| Size | Base HP | Base DV | Speed | Stations | Modules | Compartments | Passengers | Examples |
|---|---|---|---|---|---|---|---|---|
| Personal | 20 | 12 | 60 ft | 1 | 1 | — | — | Motorcycle, jetpack, hoverbike |
| Light | 40 | 13 | 50 ft | 2 | 2 | — | 0-2 | Car, speeder, small boat |
| Medium | 80 | 14 | 40 ft | 3 | 4 | 1 | 4-8 | APC, truck, shuttle, gunboat |
| Heavy | 150 | 15 | 30 ft | 5 | 6 | 3 | 8-20 | Tank, dropship, frigate |
| Massive | 300 | 16 | 20 ft | 7 | 10 | 6 | 20-100+ | Warship, mobile fortress, cruiser |
Speed is measured per Drive action (equivalent to a creature's Stride). Vehicles can take multiple Drive actions per round if the Pilot spends actions on them.
Stations are dedicated crew positions — physical consoles, seats, or operating positions where a crew member performs a specific role (Pilot, Navigator, Gunner, etc.). Each station can be occupied by one crew member. See Crew Stations below for station layouts by size.
Modules are installable hardware upgrades — weapons, armor plating, engines, sensors, and other equipment. Module slots are separate from stations and compartments.
Compartments are interior rooms that define the vehicle's internal layout. Only Medium and larger vehicles have space for compartments. See Compartments below.
Passengers are characters aboard who don't occupy a station. They can use personal weapons, cast spells, or assist crew, but cannot perform station actions. Passenger capacity is in addition to station crew.
Crew operating the vehicle equals the number of manned stations. A vehicle can operate with fewer crew than stations, but unmanned stations cannot contribute actions. A solo operator of a Medium+ vehicle can only fill one role per round.
Vehicle Tiers
Vehicle quality overlays the existing Gear Tier system. Tier affects HP, module quality, and availability.
| Tier | Label | HP Multiplier | Bonus Modules | Cost Multiplier | Availability |
|---|---|---|---|---|---|
| 1 | Salvaged | ×1.0 | +0 | ×1 | Any settlement |
| 2 | Functional | ×1.25 | +0 | ×2 | Established settlements |
| 3 | Military | ×1.5 | +1 | ×4 | Faction contacts (Level 6+) |
| 4 | Advanced | ×2.0 | +1 | ×8 | Black market (Level 11+) |
| 5 | Experimental | ×2.5 | +2 | ×16 | Research labs (Level 15+) |
| 6 | Prototype | ×3.0 | +2 | ×32 | Unique — quest reward only |
Calculating Vehicle HP: Base HP × Tier Multiplier. Example: A Tier 3 Medium vehicle has 80 × 1.5 = 120 HP.
Bonus Module Slots: Tier 3+ vehicles have additional module slots above the base for their size class.
Cost Multiplier: Applied to the frame base cost. A Tier 1 Light frame costs 500 cr; a Tier 3 Light frame costs 2,000 cr.
Vehicle Statistics Block
Every vehicle has a stat block:
SALVAGE RUNNER (Light Vehicle, Tier 2)
HP: 50 (40 × 1.25)    DV: 14 (13 base + 1 armor module)
Speed: 50 ft           Passengers: 0
Stations: 2 (Pilot, Gunner)
Modules: 2 (Reinforced Plating, Mounted MG)
Compartments: —
Weapons: Mounted Machine Gun (2d8, range 100/300)
Systems: Engine (Operational), Weapons (Operational)
Fuel: 8 hours standard operation
CR Value: 3
IRON PILGRIM (Heavy Vehicle, Tier 3)
HP: 225 (150 × 1.5)   DV: 18 (15 base + 3 armor)
Speed: 30 ft           Passengers: 12
Stations: 5 (Pilot, Navigator, Gunner ×2, Engineer)
Modules: 7 (Composite Armor, Turret MG ×2, Performance Engine,
         Sensor Array, Stabilization System, Fire Suppression)
Compartments: 3 (Crew Quarters, Medical Bay, Cargo Hold)
Weapons: 2× Turret MG (2d8, range 100/300)
Systems: Engine (Operational), Weapons (Operational),
         Sensors (Operational), Hull (Operational)
Fuel: 8 hours standard operation
CR Value: 16
Crew Roles
In vehicle combat, each crew member fills a role that determines what actions they can take. Every role uses the full 3-action economy — crew members are never idle.
Pilot (Piloting Skill)
The Pilot controls movement and positioning. Only one character can be the active Pilot at a time.
Pilot Actions 1 Action :
| Action | DC | Effect |
|---|---|---|
| Drive | — | Move the vehicle up to its speed |
| Combat Maneuver | 15-24 | Ram, bootleg turn, controlled spin, threading gaps |
| Evasive Action | 15 | Vehicle gains +2 DV (+3 with Expertise) until your next turn |
| Emergency Stop/Start | 12-20 | React to obstacles or dead engine Reaction |
| Docking/Landing | 10-20 | Precise positioning at dock/landing zone |
Pilot Bonus: A Pilot with Piloting proficiency adds their proficiency bonus to the vehicle's DV against ramming attacks.
See Skills — Piloting for full descriptions, proficiency unlocks, and expertise unlocks.
Gunner (Weapon Systems Skill)
The Gunner operates vehicle-mounted weapons. Multiple Gunners can operate on vehicles with multiple weapon mounts.
Gunner Actions 1 Action :
| Action | DC/Roll | Effect |
|---|---|---|
| Fire Mounted Weapon | Attack roll | Attack with vehicle weapon (uses Weapon Systems, not personal proficiency) |
| Aimed Shot | Attack roll (adv) | 2 actions — advantage on attack; requires stable platform (no Maneuver this round) |
| Suppressive Fire | — | 15-ft area denial, Reflex save or half weapon damage; uses 3× ammo |
| Target Lock | — | +2 to next attack vs designated target (+3 with Expertise) |
| Point Defense | 16-24 | Reaction — shoot down incoming projectile/missile |
Weapon Mounting: Each weapon module occupies 1 module slot. Turret-mounted weapons can fire in any direction. Fixed weapons can only fire in the vehicle's facing arc (front 90°).
See Skills — Weapon Systems for full descriptions, proficiency unlocks, and expertise unlocks.
Engineer (Engineering Skill)
The Engineer maintains systems, routes power, and performs field repairs. Critical for sustained engagements.
Engineer Actions 1 Action :
| Action | DC | Effect |
|---|---|---|
| Damage Control | 14-22 | Restore one vehicle system by one damage level |
| Reroute Power | — | Bonus action — boost one system at cost of another |
| Emergency Repair | 16 | 3 actions — Emergency Repair restores HP based on vehicle size: Personal/Light 2d10, Medium 3d10, Heavy 4d10, Massive 5d10 (+ your INT modifier in all cases). Usable once per short rest. |
| Overclock Engine | 14 (after) | Double speed for 1 round; risk system damage |
| Field Modification | 14-22 | Swap modules outside workshop (1 hour) |
| Assess Vehicle | 10-20 | Determine condition and capabilities of any vehicle |
System Priority: When multiple systems are damaged, the Engineer must choose which to restore first. A smart Engineer prioritizes the system most critical to the current situation — weapons when closing on an enemy, engine when fleeing.
See Skills — Engineering for full descriptions, proficiency unlocks, and expertise unlocks.
Commander (Tactics or Persuasion Skill)
The Commander coordinates the crew, issues orders, and provides tactical advantage. Not every vehicle needs a Commander — but crewed vehicles benefit enormously from one.
Commander Actions 1 Action :
| Action | DC | Effect |
|---|---|---|
| Issue Orders | 14 | One crew member gains +2 to their next check this round |
| Coordinate | 16 | Two crew members gain +1 to their next checks this round |
| Rally Crew | 16 | Remove Frightened or Shaken from one crew member; all crew gain +1 to saves vs morale effects until your next turn |
| Tactical Assessment | 14-20 | Identify enemy vehicle's weakest system; next attack against that system has advantage |
| Call Target | — | Designate priority target — all Gunners gain +1 to attacks against it until your next turn |
| Brace for Impact | — | Reaction — all crew gain +2 to saves against collision or area effects |
Commander Skill: Use Tactics (advanced skill) if available; otherwise use Persuasion or Intimidation for the social aspects of command. Tactics gives access to Tactical Assessment at reduced DC (−2).
Solo Operators: A character operating a vehicle alone fills the Pilot role by default and can use one action per turn on a different role's action (e.g., firing a weapon). They cannot Issue Orders to themselves.
Navigator (Navigation Skill)
The Navigator handles route planning, sensor operation, and electronic countermeasures. On smaller vehicles, the Pilot handles navigation — but on Medium+ vehicles operating in unfamiliar territory, open water, or space, a dedicated Navigator is the difference between arriving alive and drifting off course into a rad storm.
Navigator Actions 1 Action :
| Action | DC | Effect |
|---|---|---|
| Plot Course | 12-20 | Set optimal route; vehicle avoids hazards automatically until course changes. Reduces travel time by 25% on success by 5+ |
| Scan | 12-20 | Detect vehicles, creatures, or hazards within sensor range. Reveals number, size, speed, and bearing |
| Countermeasures | 16-22 | Deploy ECM against incoming guided weapons or targeting locks. Missile/torpedo must reroll attack with disadvantage |
| Identify Target | 14-20 | Analyze a detected contact. On success, reveal vehicle type, tier, armament, and damage status |
| Emergency Navigation | 16-24 | Reaction — when vehicle enters a hazard (minefield, asteroid field, reef), make a Navigation check. Success: vehicle avoids immediate danger. Failure: vehicle takes hazard damage |
| Coordinate Jump | 20-24 | For orbital vehicles — calculate safe transit vector. Failure means arrival off-target by 1d6 hours of travel |
Why Navigators Matter: Without a Navigator, the Pilot makes Navigation checks at disadvantage when operating in poor visibility, unfamiliar territory, or three-dimensional environments (underwater, airborne, space). A Pilot can drive — a Navigator ensures you end up where you intended.
Narrative Role: The Navigator is the crew's eyes beyond the windshield. They're the one who spots the raider ambush on the horizon before it happens, who picks up the distress signal bleeding through static, who charts a safe path through the irradiated canyon when the old highway has collapsed. In settlements, the Navigator is the one who knows the trade routes, the safe passages, and which roads belong to which faction.
See Skills — Navigation for full descriptions, proficiency unlocks, and expertise unlocks.
Communications Officer (Technology or Persuasion Skill)
The Communications Officer manages information flow — intercepting enemy transmissions, coordinating with allies, jamming hostile communications, and broadcasting on behalf of the crew. On smaller vehicles, the Navigator or Commander handles comms. On Heavy+ vehicles operating in contested territory, a dedicated Comms Officer provides a decisive tactical edge.
Communications Actions 1 Action :
| Action | DC | Effect |
|---|---|---|
| Broadcast | — | Send a message to all allied units within comms range. Can relay Commander's orders to allied vehicles (extends Issue Orders range to comms range) |
| Intercept | 16-22 | Tap into enemy communications. On success, learn enemy intentions for 1 round — all crew gain +1 to checks against intercepted targets |
| Jam Signal | 16-22 | Block enemy communications within comms range. Affected enemies cannot coordinate, call reinforcements, or receive orders. Contested Technology check each round to maintain |
| Distress Call | 12 | Broadcast emergency signal. Settlement or faction response depends on location and relationship |
| Hail | — | Open communications with another vehicle or settlement. Enables Diplomat-style social interactions at range |
| Spoof Signal | 18-24 | Broadcast false IFF (Identify Friend/Foe) signal. Enemy targeting systems treat your vehicle as friendly for 1 round. Contested Technology check to see through the spoof |
Communications Skill: Use Technology for the technical aspects (Intercept, Jam, Spoof) or Persuasion for the social aspects (Broadcast, Hail, Distress Call). A character proficient in both can use whichever is higher for any Comms action.
Narrative Role: The Comms Officer is the voice of the ship. They negotiate passage at faction checkpoints, bluff past pirate patrols, call in artillery strikes from allied positions, and listen to the chatter of the wasteland. When the party's dropship enters contested airspace, the Comms Officer is the one talking them through — or talking their way out.
Crew Stations
Stations are the physical positions inside a vehicle where crew members operate. Each station has a console, seat, or operating position designed for a specific role. The number of stations determines how many crew members can contribute actions simultaneously.
Station Layout by Size
| Size | Stations | Default Layout | Flexible Slots |
|---|---|---|---|
| Personal | 1 | Pilot | — |
| Light | 2 | Pilot + 1 flexible | 1 |
| Medium | 3 | Pilot, Navigator + 1 flexible | 1 |
| Heavy | 5 | Pilot, Navigator, Gunner, Engineer + 1 flexible | 1 |
| Massive | 7 | Pilot, Navigator, Gunner ×2, Engineer, Commander + 1 flexible | 1 |
Fixed Stations come built into every vehicle of that size. They are part of the frame and cannot be removed.
Flexible Slots can be assigned to any role during vehicle construction or refit. Choose one station type (Gunner, Engineer, Commander, Navigator, or Communications) for each flexible slot. Reassigning a flexible station requires a short rest and an Engineering DC 14 check — it involves rewiring consoles and rerouting control systems.
Station Descriptions
Each station is a physical space inside the vehicle:
- Pilot Station: The cockpit or driver's seat. Includes steering controls, throttle, and a forward viewport or display. Always located at the front of the vehicle.
- Navigator Station: A console with sensor displays, maps, and targeting data. Usually positioned beside or behind the Pilot. Requires a Sensor Array or Advanced Sensors module to function at full capacity; without sensors, Navigation checks are made at −2.
- Gunner Station: A weapon mount with targeting controls. Position depends on weapon type — turrets are topside, fixed weapons are forward-facing, broadside mounts are along the hull. Each Gunner station controls one weapon mount.
- Engineer Station: Access panels, power distribution controls, and diagnostic displays. Usually located amidships near the engine or reactor. The Engineer doesn't need line of sight to the outside — they're watching system readouts.
- Commander Station: An elevated or central position with visibility of all other stations and a tactical display. On smaller vehicles, this might be a seat with a radio. On a warship, it's the bridge command chair.
- Communications Station: A dedicated comms console with transmission/reception equipment, encryption hardware, and signal processing displays. Requires a Communications Suite or Encrypted Comms module to function; without one, the Comms Officer can only Hail and Broadcast at short range (500 ft).
Unmanned Stations
A station without a crew member is inactive — it contributes nothing. There is no autopilot for most stations (exception: a CL 2+ autonomous AI can fill one station at its skill bonus; see AI & Cognitive Levels).
Skeleton Crew: A vehicle can operate with just a Pilot, but at significant cost:
- No Navigator: Disadvantage on Navigation checks; no sensor sweeps, no countermeasures
- No Gunner: Weapons are silent. The Pilot can fire one fixed weapon per round using 1 action, but at disadvantage
- No Engineer: No damage control, no rerouting power, no field repairs. The vehicle fights with what it has
- No Commander: No coordination bonuses, no rallying. Each crew member fights alone
- No Communications: No jamming, no intercepts, no coordination with allies beyond shouting distance
Adding Extra Stations
Additional stations beyond the default layout can be installed as modifications:
| Modification | Slot Cost | Requirements | Cost |
|---|---|---|---|
| Extra Gunner Station | 1 module slot | Weapon module for new station to control | 500 cr |
| Extra Engineer Station | 1 module slot | Medium+ vehicle | 800 cr |
| Extra Navigator Station | 1 module slot | Heavy+ vehicle, second Sensor Array | 600 cr |
| Extra Communications Station | 1 module slot | Heavy+ vehicle, Comms module | 400 cr |
Extra stations allow more crew to contribute but consume module slots. A Heavy vehicle could sacrifice two module slots to add a second Gunner and a Communications station, bringing its total crew to 7.
Compartments
Compartments are interior rooms and spaces within a vehicle's hull. They define what a vehicle can do beyond combat — where the crew sleeps, where the wounded are treated, where cargo is stored, where plans are made.
Only Medium and larger vehicles have compartments. Personal and Light vehicles are too small for dedicated interior spaces.
Compartment Slots by Size
| Size | Compartment Slots | Notes |
|---|---|---|
| Personal | — | No interior space |
| Light | — | Cabin only — no room for compartments |
| Medium | 1 | Enough for one small room behind the crew stations |
| Heavy | 3 | Multi-room interior — distinct areas for different functions |
| Massive | 6 | Full deck plans — multiple levels, corridors, dedicated spaces |
Tier 4+ vehicles gain +1 compartment slot (better engineering allows more efficient use of interior volume).
Compartment Types
Each compartment occupies 1 compartment slot unless noted.
Cargo Hold
Cost: 500 cr | Slot: 1
A reinforced storage bay for supplies, loot, trade goods, or salvage.
- Store up to 2,000 lbs of cargo or one vehicle of a smaller size class (e.g., a motorcycle in a truck's cargo hold)
- Contents are secured against vehicle maneuvers (no loose crates flying around during combat)
- Can be converted to an open bay for vehicle loading/unloading 1 Action
Narrative Use: The cargo hold is what makes a vehicle a trader's vehicle. Without one, you can carry what fits in your lap. A party with a cargo hold can run supply missions, transport refugees, haul salvage from deep ruin dives, or smuggle contraband past faction checkpoints. The hold's contents tell the story of the crew — medical supplies for a settlement in need, or crates of weapons bound for the black market.
Crew Quarters
Cost: 400 cr | Slot: 1
Bunks, storage lockers, and basic living space for up to 4 crew members.
- Crew can take short rests aboard the vehicle (normally requires a safe, stable location)
- Characters resting in crew quarters recover Hit Dice as normal
- Includes personal storage for each occupant (50 lbs per person)
- If the vehicle has a Galley compartment, crew quarters occupants gain its benefits automatically
Narrative Use: Crew quarters transform a vehicle from a transport into a home. The crew's quarters are where bonds form — where the Pilot and the Engineer argue over engine tuning, where the Medic tends to wounds after a fight, where the Commander reviews maps by lamplight. Long-haul missions across the wasteland are only possible if the crew can sleep aboard. Without quarters, the crew must find shelter every night — and in the Ashfall, safe shelter is never guaranteed.
Medical Bay
Cost: 1,500 cr | Slot: 1
A treatment room with surgical table, basic medical equipment, and pharmaceutical storage.
- Allows Field Surgery at normal DC (no "unstable environment" penalty)
- Counts as a stable environment for all medical checks
- Stores up to 20 uses of medical supplies (stims, kits, pharmaceuticals)
- A Medic operating from a Medical Bay gains +2 to Medicine checks
Narrative Use: A medical bay turns the vehicle into a mobile hospital. The party can stabilize the dying, perform surgery mid-transit, and treat injuries without stopping for a settlement. In campaigns focused on aiding remote communities, a medical bay is as important as weapons — it's the reason desperate settlements send distress calls to your crew instead of someone else.
Workshop
Cost: 2,000 cr | Slot: 1
A workbench, tool storage, and fabrication space for mechanical and technical work.
- Allows crafting and vehicle repairs at −2 DC
- Field Modifications (module swaps) can be performed here without needing a settlement workshop
- Provides the "appropriate tools" requirement for Tier 1-3 crafting checks
- Engineer gains +2 to Engineering checks for repairs performed in the workshop
Narrative Use: The workshop is where the Technician disappears for hours, emerging with a rebuilt weapon or a repaired module that shouldn't work but does. It's where salvaged alien tech gets disassembled and studied, where custom ammunition is loaded, where the party's gear is maintained between settlements. A crew with a workshop is self-sufficient — they don't need a settlement's mechanics, because they are the mechanics.
Armory
Cost: 800 cr | Slot: 1
A secured weapons locker and ammunition storage facility.
- Store weapons and ammunition for up to 8 crew members in organized, quick-access racks
- Ammunition stored here is protected from environmental damage (fire, water, impacts)
- Includes a basic cleaning and maintenance station (+1 to weapon repair checks)
Narrative Use: The armory is the crew's teeth. It's where the party's arsenal lives — and its contents define what kind of crew this is. A rack of hunting rifles and shotguns says "frontier patrol." Plasma weapons and military ordnance says "faction strike team." An armory full of alien tech says "we've been places nobody else has come back from."
Brig
Cost: 600 cr | Slot: 1
A reinforced holding cell for prisoners or dangerous cargo.
- Hold up to 4 Medium-sized prisoners in secured cells
- Reinforced walls and locked door — DC 22 to break out (MIG check) or pick the lock (Sleight of Hand)
- Interior is isolated from vehicle systems — prisoners cannot access controls or sabotage the vehicle
- Includes basic monitoring (camera or viewport)
Narrative Use: Not every problem ends with a bullet. The brig lets the party take prisoners — raiders for interrogation, war criminals for faction bounties, rescued captives who can't be trusted yet. It raises moral questions: how long do you hold someone? What do you do when food runs low? The brig forces the party to confront what they do with the people they defeat.
War Room
Cost: 1,200 cr | Slot: 1
A tactical planning space with maps, displays, and briefing area.
- Commander gains +2 to Tactics checks made in the War Room
- Before combat, the crew can spend 10 minutes planning. All party members gain +1 to initiative for the next encounter
- Provides maps and intelligence displays — +2 to Navigation checks for route planning
- Can display sensor data from the Navigator's console (requires Sensor Array module)
Narrative Use: The war room is where missions begin. The Commander pins a map to the wall, marks the target, outlines the plan. The crew debates approach angles, escape routes, contingencies. It's the space where a group of survivors becomes a unit — where strategy replaces desperation. For GM purposes, the war room is the natural setting for mission briefings, intel analysis, and post-action debriefs.
Galley
Cost: 300 cr | Slot: 1
A kitchen and mess area for food preparation and crew meals.
- Prepare rations from raw supplies (extends food supplies by 50%)
- Well-Fed Bonus: Crew who eat a prepared meal gain +1 to saves against morale effects and fear for 8 hours
- Can store 2 weeks of food supplies for 4 crew members
- Includes water purification (removes common contaminants, not radiation)
Narrative Use: The galley is the heart of any crewed vehicle. It's where the crew gathers when not on duty, where arguments start and friendships solidify. A shared meal is the oldest form of unit cohesion. The galley also matters mechanically for long expeditions — without one, the crew eats cold rations and morale suffers. With one, someone cooks, and the crew fights harder because they have something worth coming back to.
Science Lab
Cost: 2,500 cr | Slot: 1
A research station with analysis equipment, sample storage, and data terminals.
- Perform Science and Xenology checks at −2 DC
- Analyze biological, chemical, and technological samples in the field (no settlement lab required)
- Store up to 20 samples in climate-controlled containers
- A character with the Pharmacology advanced skill can craft stimulants and antidotes here
Narrative Use: The science lab turns the vehicle into an exploration vessel. Alien samples can be studied mid-transit, mysterious substances analyzed before anyone touches them, environmental hazards identified before the crew walks into them. In campaigns involving alien contact, pre-war research sites, or plague outbreaks, the science lab is essential infrastructure.
Hangar Bay
Cost: 5,000 cr | Slots: 2 (occupies two compartment slots)
A vehicle bay for launching and recovering smaller craft or drones.
- Store and deploy up to 2 Light vehicles or 4 drones (Personal size)
- Launch or recover one craft per round 1 Action
- Includes basic fuel and repair supplies for stored vehicles (+2 to repairs on stored vehicles)
- Hangar doors can be sealed for atmospheric integrity (space/underwater operations)
Narrative Use: A hangar bay turns a vehicle into a carrier — a mobile base that projects force beyond its own hull. Scout craft launch from the hangar for recon runs. Combat drones deploy for perimeter defense. Damaged vehicles dock for emergency repairs. The hangar bay is what separates a large vehicle from a flagship.
Shield Generator Room
Cost: 4,000 cr | Slot: 1
A dedicated power facility housing an energy barrier generator.
- Vehicle gains temporary HP equal to 25% of its maximum HP
- Shield temp HP regenerates fully after a short rest
- When shield temp HP reaches 0, the generator must recharge (unavailable for 1d4 rounds, then restores at 25% per round)
- An Engineer stationed aboard gains advantage on Reroute Power checks involving the shield
Narrative Use: The shield generator is the mark of a vessel built for war. Its hum is audible throughout the vehicle — a constant reminder that something stands between the crew and annihilation. When the shields go down, the crew knows they're one volley from hull breach. When the Engineer gets them back online, that's a cheer-worthy moment.
Engine Room
Cost: 3,000 cr | Slot: 1
A dedicated engineering space surrounding the vehicle's primary power plant.
- Engineer gains advantage on all Engineering checks while stationed here
- Overclock Engine has no risk of system damage when performed from the engine room
- Emergency Repair restores 3d10 + INT HP instead of 2d10 + INT
- Provides direct access to all vehicle systems for rapid Damage Control (−2 DC to Damage Control checks)
Narrative Use: The engine room is the Engineer's domain — loud, hot, and dangerous. It's the beating heart of the vehicle, and the Engineer who works here knows every pipe, every junction, every warning light by sound and feel. When the vehicle takes critical damage, the engine room is where the miracle happens — or where the Engineer goes down with the ship.
Building a Vehicle Interior
When designing a vehicle, assign compartments based on the crew's mission and playstyle:
Combat Vessel: Engine Room, Armory, Shield Generator Room Exploration Ship: Science Lab, Medical Bay, Crew Quarters Trade Hauler: Cargo Hold ×2 (or ×3 on Massive), Crew Quarters, Galley Mobile Base: Crew Quarters, Workshop, Medical Bay, War Room, Galley Carrier: Hangar Bay (2 slots), Workshop, Crew Quarters
Compartments can be swapped during a Long Rest at a settlement with appropriate facilities. Swapping costs 50% of the new compartment's price (representing labor and structural modification). The old compartment's fixtures are salvaged for 25% of their original cost.
Vehicle Combat
Vehicle combat uses the same 3-action economy as personal combat but adds crew coordination, system management, and environmental interaction. The goal is simple: every crew member makes meaningful choices every round. Nobody sits idle. Nobody repeats the same check. The vehicle is a shared weapon that rewards teamwork.
Initiative
- Each crew member rolls initiative individually:
1d20 + AGI modifier + proficiency + equipment - Crew members act independently on their turns
- The vehicle moves when the Pilot takes a Drive action — not on a fixed "vehicle turn"
- First Round Coordination: At the start of vehicle combat, the Commander (if present) can make a DC 14 Tactics check as a free action. On success, up to two crew members can swap their initiative positions. This represents the Commander calling out "Gunner, hold fire — Pilot, get us in position first!"
The Combat Round
On each crew member's turn, they have 3 actions and 1 reaction, just like personal combat.
Role Actions vs Open Actions: Each station has its own action list (see Crew Roles above). In addition, every crew member — regardless of role — can use Open Actions on their turn (see below). This means a Gunner who has already fired can spend their third action putting out a fire, and an Engineer can grab a personal weapon and shoot through a viewport if there's nothing to repair.
Example Round (Heavy vehicle, 5 crew):
Kira (Pilot, Init 19): Drive (move 30 ft to flank enemy APC), Combat Maneuver (bootleg turn to expose broadside), Evasive Action (+2 DV).
Jace (Navigator, Init 17): Scan (detect second enemy vehicle approaching from east), Identify Target (reveal enemy APC has Damaged engine — speed halved), relay info to Gunner ("Hit the engine!").
Torres (Gunner, Init 14): Target Lock (+2 on enemy APC), Fire Mounted Weapon (attack roll with advantage from Navigator's Identify Target), Fire Mounted Weapon (second shot, −3 MAP).
Ren (Engineer, Init 11): Reroute Power (boost weapons +1d4 damage for this round), Damage Control (restore Stressed sensors to Operational), Brace Bulkhead (open action — reinforce hull section, +2 DV vs next attack from port side).
Captain Voss (Commander, Init 8): Issue Orders (+2 to Pilot's next check), Call Target (all Gunners gain +1 vs enemy APC), Tactical Assessment (identify enemy's weakest system — weapons, next attack vs weapons has advantage).
Open Actions
Open actions can be performed by any crew member regardless of their current station. They represent common-sense actions that don't require specialized training — a Navigator can shout a warning, an Engineer can fire a sidearm, a Gunner can help stabilize a wounded crewmate.
Open Actions 1 Action :
| Action | Check | Effect |
|---|---|---|
| Personal Attack | Attack roll | Fire a personal weapon through a firing port or open position. Disadvantage if vehicle moved this round (unless Stabilization System installed) |
| Brace for Impact | — | Gain advantage on your next save against collision, explosion, or area effect |
| Assist Crew Member | DC 10 (relevant skill) | Grant +2 to one crew member's next check this round |
| Put Out Fire | DC 14 END or Engineering | Extinguish a fire in your section of the vehicle. Unattended fires deal 1d6 damage to vehicle HP per round |
| Patch Breach | DC 14 Technology or Engineering | Temporarily seal a hull breach. Stops environmental exposure for 1d4 rounds |
| Emergency Aid | DC 15 Medicine | Stabilize a dying crew member or administer a stim |
| Spot Threat | Perception check | Attempt to detect hidden vehicles, mines, or ambushes. Relay information to Navigator or Pilot |
| Brace Bulkhead | DC 14 MIG or Engineering | Reinforce a section of hull. Next attack against the vehicle from the braced direction gets −2 to damage |
| Grab the Helm | — | If the Pilot is incapacitated, take emergency control of the vehicle. You can Drive (no other Pilot actions) until a qualified Pilot takes over |
| Activate Equipment | — | Use a module, compartment feature, or installed system (e.g., activate Stealth System, launch escape pods, deploy drones from Hangar Bay) |
| Cast a Spell | Per spell | Spellcasters can cast spells from within the vehicle as normal, targeting external enemies or buffing crew |
Design Intent: Open actions exist to eliminate dead turns. If the Engineer has already repaired everything and rerouted power, they can spot threats, brace bulkheads, put out fires, or help a wounded crew member. Nobody stares at their character sheet waiting for "their thing" to happen.
Switching Roles
A crew member can switch to a different unmanned station as 1 action (equivalent to moving to a new position inside the vehicle). They can then use their remaining actions in the new role. A crew member cannot occupy two roles simultaneously.
Quick Switch Reaction: If the Pilot is incapacitated, any crew member can use their reaction to move to the Pilot station and take emergency control (Drive only, no other Pilot actions until their next turn). This prevents the vehicle from careening out of control.
Improvised Station Actions
Any crew member can attempt another role's basic actions at disadvantage without switching stations — representing shouting orders to the targeting computer, slapping a console to reroute power, or grabbing a fire extinguisher near the gun turret. This costs 1 action and uses the character's own skill modifier (not the role's optimal skill).
Improvised station actions are limited to the basic action for each role:
- Pilot: Drive only
- Navigator: Scan only
- Gunner: Fire Mounted Weapon only (single shot)
- Engineer: Damage Control only
- Commander: Issue Orders only (one target, +1 instead of +2)
- Communications: Broadcast only
Specialized actions (Combat Maneuver, Countermeasures, Aimed Shot, Reroute Power, etc.) require being at the station.
Passengers
Characters not filling a crew role are passengers. Passengers use the full 3-action economy with Open Actions and their personal abilities.
What Passengers Can Do:
- Use personal weapons (ranged attacks from firing ports or open positions)
- Cast spells targeting creatures outside the vehicle
- Use skills, items, or abilities as normal
- Perform any Open Action
- Provide Aid actions to crew members (+2 to their next check)
- Repel Boarders — fight enemies who breach the hull (see Boarding Actions)
- Ready Personal Abilities — prepare actions for when the vehicle stops or doors open
Firing from a Moving Vehicle: Passengers (and anyone using personal weapons instead of mounted ones) attack with disadvantage unless the vehicle has a Stabilization System module or the Pilot did not take a Drive action this round.
Passengers Are Not Useless: A party of six in a vehicle with five stations still has a fully active sixth member. That member can spot threats, provide aid, heal crew, cast spells, prepare for boarding, or use personal weapons. In a chase, passengers can throw obstacles, use abilities to slow pursuers, or ready actions for when they close to boarding range.
Targeting Vehicles
Attackers outside the vehicle can target:
- The vehicle itself: Attack vs vehicle DV. Damage applies to vehicle HP.
- Crew/passengers: Attack vs individual's DV with +2 cover bonus (partial cover from vehicle structure). If the vehicle has an enclosed cabin, this becomes +5 (heavy cover) or total cover (cannot target occupants directly — must damage the vehicle).
- Specific systems: An attacker can declare a called shot against a specific vehicle system (Engine, Weapons, Sensors, or Hull) at −3 to hit. On hit, that system takes one level of damage in addition to normal HP damage. This gives infantry and small vehicles a tactical way to disable larger opponents.
Vehicle Attacks
Ramming: The Pilot makes a Combat Maneuver check (DC 15). On success, deal ram damage based on vehicle size:
| Attacker Size | Ram Damage | Save DC |
|---|---|---|
| Personal | 2d6 | 12 |
| Light | 3d8 | 14 |
| Medium | 4d10 | 16 |
| Heavy | 6d10 | 18 |
| Massive | 8d10 | 20 |
The rammed target (vehicle or creature) makes a Reflex save against the listed DC. On failure, full damage and knocked prone/spun out. On success, half damage.
The ramming vehicle takes half the damage it deals (structural stress). The Pilot can reduce this by 1d10 with a successful DC 16 Piloting check Free .
Ramming Creatures: A vehicle that rams a creature of smaller size than the vehicle deals full ram damage (no attack roll needed — the creature makes a Reflex save to dive aside for half damage). Creatures two or more size categories smaller are automatically hit.
Sideswiping: A less destructive alternative to ramming. The Pilot makes a Combat Maneuver check (DC 14) against an adjacent vehicle. On success, deal half ram damage and force the target to make a Piloting check (DC = your Piloting result) or lose control for 1 round (speed halved, −2 DV, can only Drive on next turn).
System Damage Track
As vehicles take damage, their systems degrade. The system damage track applies penalties based on remaining HP percentage.
| HP Remaining | Status | Effect |
|---|---|---|
| 100–76% | Operational | All systems functional |
| 75–51% | Stressed | −2 to all vehicle-related checks |
| 50–26% | Damaged | −4 to all vehicle-related checks, speed halved, 1 random system disabled |
| 25–1% | Critical | −6 to all vehicle-related checks, speed quartered, 2 systems disabled, fires may start (50% chance per round) |
| 0% | Disabled | Vehicle inoperable — crew must evacuate |
System Disabled: When a system is disabled, roll 1d4:
- Engine — Vehicle cannot move. Speed becomes 0.
- Weapons — All mounted weapons offline. Gunners cannot fire.
- Sensors/Comms — Navigation and targeting systems down. −4 to Weapon Systems and Navigation checks (stacks with track penalty).
- Life Support/Hull — Crew exposed to environment. If in hostile conditions (vacuum, underwater, toxic atmosphere), crew takes 1d6 damage per round.
Cascade Failures: When a vehicle enters Critical status, the GM rolls on the Cascade Failure table at the start of each round:
| d6 | Cascade Failure |
|---|---|
| 1 | Fire breaks out in a random compartment. Deals 1d6 vehicle HP per round until extinguished. Crew in that compartment take 1d4 fire damage per round |
| 2 | Power fluctuation. One random station goes dark for 1 round. The crew member there can only use Open Actions |
| 3 | Structural groan. Hull integrity failing — next hit deals +1d6 bonus damage |
| 4 | Sparks and smoke. All crew make DC 12 END save or take 1d4 damage from electrical discharge and debris |
| 5 | System overload. One operational system drops to Stressed |
| 6 | Holding together. No additional failure this round — but the crew can hear the hull creaking |
Repairing Systems: The Engineer can restore disabled systems using Damage Control. Each system level requires a separate check:
- Stressed → Operational: DC 14
- Damaged → Stressed: DC 18
- Disabled → Damaged: DC 22
- With Expertise: restore two levels in one check
Critical Hits on Vehicles
A natural 20 against a vehicle causes a system critical in addition to double damage. The attacker chooses which system is affected (Engine, Weapons, Sensors, or Hull). That system drops one damage level immediately, regardless of the vehicle's overall HP threshold.
Vehicle Destruction
When a vehicle reaches 0 HP, it is Disabled — not destroyed. The crew has 1d4 rounds to evacuate before the vehicle becomes unsalvageable (fire, structural collapse, explosion).
Catastrophic Destruction: If a vehicle takes damage equal to its max HP while already at 0 HP, it explodes. All creatures within the blast radius take damage:
| Vehicle Size | Blast Radius | Explosion Damage |
|---|---|---|
| Personal | 5 ft | 2d6 |
| Light | 10 ft | 3d8 |
| Medium | 15 ft | 4d10 |
| Heavy | 20 ft | 6d10 |
| Massive | 30 ft | 8d10 |
Reflex save DC 15 for half damage.
Chase Encounters
Not every vehicle encounter is a slugfest. Sometimes the goal is to catch something — or to escape something. Chase encounters are structured encounters with escalating tension, environmental obstacles, and a clear win/loss condition.
When to Use a Chase
Use a chase encounter instead of standard vehicle combat when:
- One side is trying to flee or pursue — the goal isn't to destroy, it's to catch or escape
- The environment is the primary obstacle — a narrow canyon, a collapsing highway, a storm
- You want fast-paced, high-stakes action without grinding through HP totals
- The narrative demands urgency — a ticking clock, a kidnapping, a delivery under fire
Chase Structure
A chase has three components: Range, Rounds, and Complications.
Range Bands
Instead of exact distances, chases use abstract range bands that track relative positioning between vehicles.
| Range Band | Distance | Effect |
|---|---|---|
| Engaged | 0-30 ft | Boarding possible. Ramming possible. All weapons can fire. Melee attacks between vehicles possible with reach |
| Close | 30-200 ft | All weapons can fire. Passengers can fire personal weapons (normal range penalties apply) |
| Medium | 200-1,000 ft | Only vehicle-mounted weapons can fire. Long range penalties apply to shorter-range weapons |
| Far | 1,000-5,000 ft | Only long-range weapons (missiles, torpedoes, railguns) can fire. Sensor contact maintained |
| Extreme | 5,000+ ft | No weapons can fire. Sensor contact only. One more successful Disengage and the quarry escapes |
Starting Range: The GM sets the starting range band based on the narrative. An ambush starts at Close or Engaged. A pursuit after a spotted target starts at Far.
Chase Rounds
Each chase round follows this sequence:
- Complication — The GM introduces an environmental obstacle or event (see Complication Table)
- Initiative — Crew members act in initiative order as normal
- Chase Check — At the end of the round, both vehicles' Pilots make an opposed Piloting check (modified by vehicle speed difference). The winner shifts the range band one step in their favor (closer if pursuing, farther if fleeing)
- Escalation — After each round, the chase intensifies (see Escalation)
Speed Advantage: The faster vehicle adds the speed difference (in 10-ft increments) as a bonus to their Pilot's chase check. A vehicle with 50 ft speed chasing one with 30 ft speed adds +2 to the chase check. This bonus caps at +4.
Winning a Chase:
- Pursuer wins when range reaches Engaged and the quarry fails to disengage for 2 consecutive rounds (caught — boarding, forced stop, or surrounded)
- Quarry wins when range moves beyond Extreme (escaped — pursuer loses contact)
- Either side can end the chase early by disabling the other vehicle through combat
Chase Complications
At the start of each round, the GM rolls or chooses a complication. Complications affect all vehicles in the chase — both sides must react.
Terrain Complications (d8):
| d8 | Complication | Effect |
|---|---|---|
| 1 | Narrow passage | All vehicles make Piloting DC 16 or scrape walls (2d6 damage, lose 1 range band). Larger vehicles roll at disadvantage |
| 2 | Debris field | Wreckage, fallen buildings, or floating junk. Piloting DC 14 or take 1d8 damage and speed halved this round |
| 3 | Sharp turn | The route forces a hard turn. Piloting DC 15 or overshoot (lose 1 range band). Medium+ vehicles roll at −2 |
| 4 | Civilian traffic | Bystanders, merchant vehicles, or wildlife in the path. Piloting DC 14 to avoid. Failure: collision (2d6 damage to both parties) and disadvantage on chase check this round |
| 5 | Terrain change | Road becomes off-road, water becomes rapids, air becomes storm. Movement type matters — unsuitable vehicles lose 1 range band automatically |
| 6 | Obstacle ahead | Collapsed bridge, gate, asteroid, minefield. The lead vehicle spots it first — must choose: brake (lose 1 range band), smash through (Piloting DC 16, failure = 3d8 damage), or detour (lose 2 range bands but safe) |
| 7 | Environmental hazard | Radiation zone, toxic cloud, electrical storm, geyser field. All crew make DC 14 END save or take 2d6 damage. Vehicles take 1d8 damage. Sealed vehicles with Life Support are immune to crew damage |
| 8 | Clear stretch | Open terrain — no complication this round. Both Pilots can push speed to maximum. Chase check this round has advantage for both sides |
Weather/Condition Overlay (optional, d4):
| d4 | Condition | Effect |
|---|---|---|
| 1 | Low visibility (fog, sandstorm, darkness) | All attacks at disadvantage. Navigator's Scan is the only way to track enemy position. No Scan = chase check at disadvantage |
| 2 | Slick surface (rain, ice, oil) | All Piloting checks at −2. Combat Maneuvers require DC +2. Ramming damage increased by 1d6 (both vehicles) |
| 3 | Crosswinds/currents | Hovering and flying vehicles make DC 14 Piloting check each round or drift 1 range band in a random direction. Ground vehicles unaffected |
| 4 | Clear conditions | No weather effect |
Crew Actions During Chases
Every crew member has specific things they can do during a chase that go beyond their standard role actions:
Pilot: Standard role actions plus:
Navigator: Critical in chases:
Gunner: Combat during chases:
- Standard fire actions at range-appropriate targets
- Shoot Out Tires/Engines (called shot, −3 to hit): On hit, target vehicle's speed is reduced by 10 ft for 1d4 rounds (stacks). Reduces their chase check bonus
Engineer: Keeping the vehicle alive:
- Overclock Engine is especially valuable — doubling speed for the chase check
Commander: Coordination is king:
Communications Officer:
Passengers:
Escalation
Chases get more dangerous the longer they go. After round 3 and every round thereafter:
- Complications increase in DC by +2 (the terrain gets worse, the weather closes in, the route gets narrower)
- The GM should introduce compound complications — two things happening at once (narrow passage + low visibility, debris field + slick surface)
- If both vehicles are at Critical damage status, the chase becomes desperate — each round, both vehicles take 1d6 automatic damage from the strain of running at full speed while falling apart
Chase Duration: Most chases should last 3-5 rounds. Longer than 5 rounds risks losing momentum. If a chase drags past round 5, the GM should force a resolution — the terrain funnels both vehicles into a dead end (forced confrontation), the quarry reaches safe territory (forced escape), or both vehicles are too damaged to continue (mutual stop).
Boarding Actions
When vehicles reach Engaged range, crew can attempt to board the enemy vessel. Boarding is the bridge between vehicle combat and personal combat — it's where the Warrior's sword matters more than the Gunner's turret.
Initiating a Board
Requirements:
- Vehicles must be at Engaged range (0-30 ft)
- Pilot must maintain position 1 Action
- A crew member declares a boarding action
Boarding Methods:
| Method | Check | Requirements | Effect |
|---|---|---|---|
| Jump Across | DC 16 Athletics or Acrobatics | Open-top vehicles or external positions | Land on enemy vehicle's exterior. 1 action. Failure = fall (take falling damage, chase continues without you) |
| Grapple Line | DC 14 Athletics | Grappling hook, cable, or winch | Attach line between vehicles. 1 action to attach, 1 action to cross. Enemies can cut the line 1 Action |
| Boarding Ramp | — | Boarding ramp module or improvised bridge | Walk across. Safe but requires 1 round to deploy and both vehicles must remain Engaged |
| Breach Hull | DC 18 MIG or Demolitions | Explosives, cutting tools, or brute force | Cut or blast through enemy hull. 2 actions. Creates a breach point but alerts all enemy crew |
| Teleport/Magic | Per spell | Teleportation spell or ability | Bypass all physical defenses. Appears inside enemy vehicle |
| Docking Clamp | DC 14 Piloting | Docking clamp module | Lock vehicles together. Neither can move until clamp is released 1 Action . Stable platform — no boarding check needed |
Combat Aboard Enemy Vehicles
Once aboard, boarding parties use standard personal combat rules with these modifications:
- Tight Quarters: Interior vehicle spaces are cramped. Reach weapons have disadvantage. Thrown weapons and firearms at point-blank range are the norm. Medium+ creatures have disadvantage on attacks in Personal/Light vehicle interiors.
- Critical Targets: Boarders can attack crew at their stations, sabotage systems (Technology DC 16 to disable a system for 1d4 rounds), or seize control of stations.
- Seizing Control: A boarder who reaches the Pilot station and succeeds on a contested Piloting or Athletics check against the current Pilot can take the helm. The vehicle is now under the boarder's control. This is how you steal a ship.
- Sabotage: Instead of fighting crew, a boarder can target the vehicle's internals. Technology or Engineering DC 16 to disable one system. DC 20 to set the vehicle to self-destruct (1d4 rounds until explosion). Sabotage takes 2 actions.
- Defend the Ship: Crew members can abandon their stations to fight boarders using standard personal combat. An abandoned station is inactive until someone returns to it.
Anti-Boarding Measures
Smart crews prepare for boarding:
- Sealed Hatches: DC 18 to breach (adds 1 round delay to boarding)
- Interior Defenses: Automated turrets (1d8 damage, +4 to hit, attack each boarder once per round) or electrified hull (1d6 shock damage to anyone touching the exterior without insulation)
- Security Protocol: Commander's Brace for Impact reaction grants crew +2 to initiative for the anti-boarding fight
- Vent Compartment: If boarders are in a sealable compartment, crew can vent atmosphere (DC 16 Technology). Boarders make DC 14 END save each round or take 2d6 damage and gain Exhaustion 1. Only works if vehicle has Life Support
Environmental Hazards
The wasteland doesn't care about your vehicle. Radiation storms, collapsing infrastructure, alien anomalies, and hostile biomes threaten vehicles and crew alike. Environmental hazards add decision points to vehicle encounters — do you push through or go around?
Hazard Types
Terrain Hazards
| Hazard | Effect on Vehicle | Effect on Crew | Navigation DC |
|---|---|---|---|
| Rubble Field | Difficult terrain (×2 movement cost). Piloting DC 14 or take 1d6 damage per round | — | 14 |
| Collapsed Structure | Blocks path. Must find alternate route (lose 1d4 rounds) or smash through (DC 16 ram, take half ram damage) | — | 16 |
| Minefield | Piloting DC 18 per round to navigate. Failure triggers mine: 3d8 damage to vehicle | Crew make Reflex DC 14 or take 1d6 from concussion | 18 |
| Sinkhole/Crevasse | Piloting DC 16 to avoid. Failure: vehicle falls in (2d10 damage per 10 ft, stuck until extricated) | Crew make AGI save DC 14 or take 2d6 impact damage | 16 |
| Dense Forest/Urban Ruins | Speed halved. No line of sight beyond 60 ft. Advantage on Stealth approaches | — | 12 |
Weather Hazards
| Hazard | Effect on Vehicle | Effect on Crew | Duration |
|---|---|---|---|
| Rad Storm | Vehicle electronics: −2 to all sensor/comms checks | Exposed crew take 1d6 radiation per round. Sealed vehicles protect crew | 1d4 hours |
| Dust/Sand Storm | Visibility 30 ft. Speed halved. Piloting DC 14 each round or go off-course | Exposed crew take 1d4 abrasion damage per round | 2d4 hours |
| Electrical Storm | Lightning strike on vehicle each round (20% chance): 3d6 electrical damage, random system Stressed | Exposed crew make DC 14 END save or Stunned for 1 round | 1d6 hours |
| Acid Rain | Vehicle takes 1d4 corrosion damage per hour. DV reduced by 1 per 4 hours of exposure | Exposed crew take 1d4 acid damage per 10 minutes | 1d8 hours |
| Flash Flood / Rogue Wave | Ground vehicles: Piloting DC 18 or swept away (move 1d4 × 30 ft in flood direction, take 2d8 damage). Water vehicles: Piloting DC 14 | Exposed crew: Athletics DC 16 or swept from vehicle | 1d4 rounds |
Anomaly Hazards (Post-Apocalyptic/Alien)
| Hazard | Effect | DC |
|---|---|---|
| Gravity Anomaly | Vehicle weight doubles or halves. Doubled: speed halved, +2 DV. Halved: speed doubled, −2 DV, Piloting DC 16 each round or lose control | 18 Navigation to detect before entering |
| Temporal Stutter | Time moves at different rates. Roll 1d4 each round: 1-2 = crew loses 1 action, 3-4 = crew gains 1 bonus action. Unpredictable | 20 Arcana or Science to detect |
| Null Field | All technology fails. Engines stall, weapons offline, sensors dead. Vehicle coasts on momentum (half speed, decreasing by 10 ft/round). Only manual/mechanical systems work | 16 Navigation to detect, 20 Engineering to insulate systems |
| Spore Cloud | Biological contamination. Unsealed vehicles: all crew make DC 16 END save or Poisoned for 1 hour. Vehicle hull takes 1d4 acid damage per round from corrosive spores | 14 Survival or Science to detect |
Navigating Hazards
The Navigator is critical for hazard management:
- Detect Hazard (Scan action, Navigation DC varies): Spot a hazard before the vehicle enters it. Early detection allows the Pilot to route around it
- Chart Safe Path (Plot Course action, Navigation DC = hazard DC + 2): Find the safest route through a hazard. All Piloting checks within the hazard gain +2
Without a Navigator, the Pilot must handle detection and navigation alone, making all hazard-related checks at disadvantage.
Encounter Types
Vehicle encounters aren't just "drive and shoot." Different encounter types create different pacing, challenges, and opportunities for player engagement.
Pitched Battle
The standard vehicle combat encounter — two or more vehicles fighting to disable or destroy each other.
Structure: Standard initiative, standard actions, fight until one side is disabled, destroyed, or retreats.
GM Tips:
- Add environmental hazards to prevent static positioning
- Use multiple smaller enemies instead of one big one — forces the crew to prioritize targets
- Include infantry support on one or both sides to create a mixed-scale encounter
- Give the terrain features that reward maneuvering (cover, chokepoints, elevation)
Convoy Defense / Ambush
One side protects a slow-moving target (cargo vehicle, refugee column, fuel tanker) while the other attacks it.
Structure:
- Defenders win by getting the convoy to its destination or driving off all attackers
- Attackers win by destroying or capturing the convoy target
- The convoy moves at a fixed speed (usually 20 ft/round) along a set route
- Attackers choose when and where to strike — defenders must react
Player Engagement: Every role matters:
- Pilot keeps the escort vehicle between the convoy and attackers
- Navigator spots ambush positions and warns of incoming threats
- Gunner engages attackers before they reach the convoy
- Engineer keeps both the escort and convoy vehicles running
- Commander coordinates defense, prioritizes threats
- Passengers can ride on the convoy vehicle itself, providing personal-scale defense
Blockade Run
The party must get their vehicle through a defended position — a checkpoint, a minefield, a narrow strait covered by shore batteries, or an orbital defense grid.
Structure:
- Defenses are fixed positions with known locations (or discoverable via Navigation checks)
- The party must cross a series of zones (3-5), each with its own hazards and defenders
- Each zone has a condition for clearing it: destroy the defense, bypass it (Stealth/Piloting), hack it (Technology/Hacking), or talk through it (Persuasion via Comms)
- Failure in one zone doesn't end the run but makes subsequent zones harder (alert level increases, reinforcements called)
Player Engagement: Multiple approaches reward diverse party skills. The Hacker can disable turrets. The Diplomat can bluff past checkpoints. The Pilot can thread the needle through a gap in the defenses. The Navigator can find an unguarded route. The run is a series of linked challenges, not a single extended fight.
Salvage / Exploration
The party explores a wreck, derelict, or unknown structure using their vehicle as a mobile base.
Structure:
- The vehicle provides a safe base of operations (Medical Bay, Workshop, sensors)
- Crew split between those staying aboard (monitoring sensors, providing overwatch) and those exploring on foot
- The Navigator tracks the exploration team's position and warns of hazards
- The Engineer keeps the vehicle ready for emergency extraction
- The Communications Officer maintains contact with the away team
Player Engagement: This encounter type creates natural split-party scenarios without the usual problems — the crew aboard the vehicle has active roles (sensor monitoring, comms, overwatch fire) while the away team handles personal-scale exploration. Both groups are engaged simultaneously.
Dogfight
A fast, chaotic battle between multiple small vehicles (Personal and Light size). Emphasizes pilot skill over firepower.
Structure:
- Use range bands instead of exact positioning (like chases)
- Each vehicle has its own range band relative to each other vehicle
- The fight is fluid — positions change constantly
- Victory comes from disabling or forcing enemies to break off, not slugging through HP
Player Engagement: In a dogfight, solo operators (one person per vehicle) get to use the full action economy — Drive, fire, evade, all in the same turn. For crewed Light vehicles (Pilot + Gunner), the coordination is tight and fast. Dogfights should be short (3-4 rounds) and decisive.
Encounter Pacing
Escalation Phases
Long vehicle encounters should escalate through three phases to maintain dramatic tension:
Phase 1: Engagement (Rounds 1-2) The sides make contact. Sensors light up. The Commander calls battle stations. The first shots are fired.
- Systems are operational, resources are full
- Crew establishes their rhythm — Pilot positions, Gunner fires, Engineer monitors
- The biggest decision: approach or engage at range?
Phase 2: Attrition (Rounds 3-5) The fight gets real. Damage accumulates. Systems start failing. Resources drain.
- System damage track starts biting — the −2/−4 penalties make every check harder
- The Engineer has real repair decisions — which system do I fix first?
- The Commander has to prioritize — buff the struggling Pilot or the overheating Gunner?
- Environmental hazards introduced by GM hit harder against damaged vehicles
- Cascade failures begin on Critical vehicles — fires, power loss, hull groaning
Phase 3: Crisis (Rounds 6+) Something has to give. Both sides are damaged. The fight either ends or transforms.
- Vehicles at Critical or Disabled status
- Boarding becomes attractive — easier to take the enemy vehicle than destroy it
- Crew must choose: fight to the end, attempt escape, or surrender?
- The GM should push toward resolution — reinforcements arrive, the terrain forces a decision, a catastrophic system failure changes everything
Pacing Guidelines for GMs
Keep rounds under 10 minutes of real time. Vehicle combat with 5+ crew members can slow down. Mitigation:
- Have crew members pre-plan their actions while waiting for their turn
- Resolve Open Actions quickly (most don't require rolls)
- Use the Commander's Coordinate action to batch multiple crew actions together narratively
- If a station has nothing urgent to do, encourage the player to use Open Actions or assist others — don't let them sit idle
End combat before it becomes a grind. If both sides are at Damaged status and neither is gaining advantage, introduce a complication that forces resolution — a third party arrives, the terrain collapses, an environmental hazard threatens both sides.
Vary encounter types within a session. A session with vehicle content should mix encounter types — a chase followed by a pitched battle, or an exploration followed by an ambush. Don't run two identical pitched battles in the same session.
Vehicle Design
Players and GMs can build custom vehicles using the modular construction system. A vehicle is assembled from a Frame, Stations assigned to crew roles, Modules installed in hardware slots, and Compartments filling interior spaces.
Step 1: Choose a Frame
The frame determines the vehicle's size class, base statistics, movement type, station count, module slots, and compartment capacity.
| Frame | Size | Base Cost | Movement Type | Stations | Compartments |
|---|---|---|---|---|---|
| Cycle | Personal | 200 cr | Ground (wheeled) | 1 | — |
| Hoverbike | Personal | 400 cr | Hover (5 ft altitude) | 1 | — |
| Jetpack | Personal | 350 cr | Flight (60 ft ceiling) | 1 | — |
| Car/Truck | Light | 500 cr | Ground (wheeled) | 2 | — |
| Speeder | Light | 800 cr | Hover (10 ft altitude) | 2 | — |
| Boat | Light | 600 cr | Water | 2 | — |
| APC | Medium | 2,000 cr | Ground (tracked) | 3 | 1 |
| Shuttle | Medium | 4,000 cr | Flight (atmospheric) | 3 | 1 |
| Gunboat | Medium | 3,000 cr | Water | 3 | 1 |
| Walker | Medium | 5,000 cr | Ground (legged) | 3 | 1 |
| Tank | Heavy | 8,000 cr | Ground (tracked) | 5 | 3 |
| Dropship | Heavy | 15,000 cr | Flight (atmospheric/orbital) | 5 | 3 |
| Frigate | Heavy | 12,000 cr | Water/submerged | 5 | 3 |
| Crawler | Massive | 25,000 cr | Ground (tracked/legged) | 7 | 6 |
| Warship | Massive | 50,000 cr | Water/submerged | 7 | 6 |
| Carrier | Massive | 60,000 cr | Flight (orbital) | 7 | 6 |
Movement Types:
- Ground (wheeled): Fastest on roads, difficult terrain costs ×3 movement
- Ground (tracked): Slower but handles difficult terrain at ×2 movement
- Ground (legged): Handles all terrain at ×2, can climb, ignores obstacles smaller than it
- Hover: Ignores ground-level difficult terrain, cannot exceed altitude limit
- Flight (atmospheric): Full 3D movement within atmosphere
- Flight (orbital): Can reach orbit; operates in vacuum
- Water: Surface operation on bodies of water
- Water/submerged: Can operate on surface or submerge
Apply the Tier cost multiplier to the frame base cost.
Step 2: Install Modules
Each module occupies 1 module slot unless noted. Modules are organized into four categories: Engine, Armor, Weapon, and Utility.
Engine Modules
| Module | Tier | Effect | Cost |
|---|---|---|---|
| Scrap Engine | 1 | Base speed, unreliable (stalls on natural 1 Piloting) | 100 cr |
| Standard Engine | 2 | Base speed, reliable | 300 cr |
| Performance Engine | 3 | +10 ft speed | 800 cr |
| Military Turbine | 4 | +20 ft speed, advantage on Overclock | 2,500 cr |
| Fusion Drive | 5 | +30 ft speed, unlimited fuel | 8,000 cr |
| Afterburner | 3 | 1/combat: double speed for 1 round (no Overclock check) | 1,200 cr |
Armor Modules
| Module | Tier | Effect | Cost |
|---|---|---|---|
| Scrap Plating | 1 | +1 DV | 100 cr |
| Reinforced Plating | 2 | +2 DV | 400 cr |
| Composite Armor | 3 | +3 DV, DR 5 vs physical | 1,500 cr |
| Reactive Armor | 4 | +3 DV, DR 5 vs all, deflect on nat 20 (attacker rerolls) | 4,000 cr |
| Hardlight Barrier | 5 | +4 DV, DR 10 vs energy | 10,000 cr |
| Hull Reinforcement | 2 | +25% max HP (applied after tier multiplier) | 500 cr |
Weapon Modules
| Module | Tier | Damage | Range | Properties | Cost |
|---|---|---|---|---|---|
| Mounted MG | 2 | 2d8 | 100/300 | Auto-fire | 600 cr |
| Turret MG | 2 | 2d8 | 100/300 | Auto-fire, turret | 900 cr |
| Missile Rack | 3 | 3d10 | 200/600 | 6 missiles, reload 3 Actions | 2,000 cr |
| Plasma Cannon | 3 | 3d8 energy | 150/450 | Overheat (cooldown 1 round after 3 shots) | 2,500 cr |
| Railgun | 4 | 4d10 | 300/900 | Penetrate (ignore DR), 2-action reload | 5,000 cr |
| Point Defense System | 3 | 1d8 | 60/180 | Automated — can Point Defense as free action | 1,800 cr |
| Heavy Cannon | 4 | 4d12 | 200/600 | Fixed (front arc only), 2-action reload | 6,000 cr |
| Torpedo Tube | 4 | 5d10 | 500/1500 | 4 torpedoes, water/space only | 4,500 cr |
| Energy Lance | 5 | 5d8 energy | 200/600 | Penetrate, no ammo | 12,000 cr |
Turret vs Fixed: Turret-mounted weapons can fire in any direction. Fixed weapons fire only in the vehicle's facing arc (front 90°). Fixed weapons cost 30% less but require the Pilot to position the vehicle.
Ammunition: Ballistic weapons require ammunition. Standard loadout is 100 rounds (enough for most combats). Resupply costs 10% of the weapon module's price per 100 rounds.
Utility Modules
| Module | Tier | Effect | Cost |
|---|---|---|---|
| Cargo Bay | 1 | Store 500 lbs of cargo | 100 cr |
| Passenger Seats | 1 | Carry additional passengers (4 per module) | 150 cr |
| Stabilization System | 2 | Passengers fire without disadvantage | 400 cr |
| Sensor Array | 2 | +2 to Navigation checks, detect vehicles at 5 miles | 500 cr |
| Advanced Sensors | 4 | +4 to Navigation checks, detect at 20 miles, see through concealment | 3,000 cr |
| Communications Suite | 2 | Radio communication, 50-mile range | 300 cr |
| Encrypted Comms | 3 | Secure communications, DC 20 to intercept | 1,000 cr |
| Stealth System | 4 | Disadvantage on checks to detect this vehicle | 4,000 cr |
| Medical Bay | 3 | Allows Field Surgery (vehicle counts as stable environment) | 1,500 cr |
| Workshop | 3 | Allows Field Modifications at −2 DC | 2,000 cr |
| Tow Hitch | 1 | Tow one vehicle of equal or smaller size | 50 cr |
| Winch | 1 | 200 ft cable, 2,000 lb capacity | 100 cr |
| Fire Suppression | 2 | Auto-extinguish internal fires; +2 to Engineering checks vs fire damage | 300 cr |
| Escape Pods | 3 | Crew can evacuate 1 Action (Medium+ vehicles) | 1,000 cr |
| Drone Bay | 3 | Store and deploy up to 2 drones (occupies 2 slots) | 2,500 cr |
Step 3: Assign Stations
Assign crew roles to each station slot. Fixed stations are predetermined by vehicle size (see Crew Stations — Station Layout by Size). Flexible station slots can be assigned to any role.
For each weapon module installed, ensure a Gunner station exists to control it. Weapons without a dedicated Gunner station can only be fired by a crew member who spends 1 action to switch to that weapon (improvised operation, at disadvantage).
Step 4: Choose Compartments (Medium+ Only)
Select compartments for each compartment slot. See Compartments for the full list of compartment types, costs, and effects. Compartment choices define the vehicle's mission profile and should match the crew's intended role.
Step 5: Calculate Final Statistics
- Start with frame base stats (size class determines HP, DV, speed, stations, modules, compartments)
- Apply tier multiplier to HP
- Add module effects (DV bonuses, speed bonuses, weapon loadout)
- Add compartment effects (bonuses, capacities)
- Calculate total cost (frame × tier multiplier + all modules + all compartments)
- Determine CR value (see Vehicle CR below)
Example Build — "Dust Devil" Raider Buggy (Light):
- Frame: Car/Truck (Light, 500 cr)
- Tier: 2 (Functional, ×2 = 1,000 cr frame)
- Stations: 2 (Pilot, Gunner)
- Modules: Reinforced Plating (+2 DV, 400 cr), Turret MG (2d8, 900 cr)
- Compartments: — (Light vehicles have no compartments)
- HP: 40 × 1.25 = 50
- DV: 13 + 2 = 15
- Speed: 50 ft | Passengers: 0
- Total Cost: 1,000 + 400 + 900 = 2,300 cr
- CR Value: 3
Example Build — "Wasteland Pilgrim" Expedition Dropship (Heavy):
- Frame: Dropship (Heavy, 15,000 cr)
- Tier: 3 (Military, ×4 = 60,000 cr frame)
- Stations: 5 (Pilot, Navigator, Gunner ×2, Engineer)
- Modules (7): Performance Engine (+10 ft, 800 cr), Composite Armor (+3 DV/DR 5, 1,500 cr), Turret MG ×2 (2d8 each, 1,800 cr), Sensor Array (+2 Nav, 500 cr), Stabilization System (400 cr), Fire Suppression (300 cr)
- Compartments (3): Crew Quarters (400 cr), Medical Bay (1,500 cr), Cargo Hold (500 cr)
- HP: 150 × 1.5 = 225
- DV: 15 + 3 = 18
- Speed: 40 ft flight | Passengers: 12
- Total Cost: 60,000 + 5,300 + 2,400 = 67,700 cr
- CR Value: 16
Drones
Drones are autonomous or remote-controlled vehicles of Personal size. They follow all standard vehicle rules with these modifications:
Drone Basics
- Size: Always Personal (20 base HP, DV 12, 1 module slot)
- Range: Remote drones operate within 500 ft of the controller (1 mile with Communications Suite). Beyond range, the drone hovers/stops.
- Initiative: Remote drones act on the controller's turn (controller spends actions to command them). Autonomous drones roll their own initiative.
Drone Frames
| Frame | Movement | Base Cost | Notes |
|---|---|---|---|
| Ground Drone | 40 ft ground | 150 cr | Wheeled or tracked, low profile |
| Hover Drone | 50 ft hover | 300 cr | Up to 30 ft altitude |
| Aerial Drone | 60 ft flight | 500 cr | Full atmospheric flight |
| Aquatic Drone | 40 ft swim | 400 cr | Submersible |
Operating Drones
Remote Control 1 Action :
- Move: Direct drone to move up to its speed
- Attack: Drone fires its weapon (uses operator's Weapon Systems or Technology modifier)
- Scan: Drone makes a Perception-equivalent check using operator's Navigation or Technology modifier
- Return/Dock: Drone returns to operator or drone bay
Multiple Drones: A character can control only 1 drone per action spent. Controlling 2 drones requires 2 actions, leaving only 1 action for personal use. The Technician's Drone Commander feature (if taken) allows commanding 2 drones with 1 action.
Autonomous Drones
Autonomous drones have limited onboard AI (Cognitive Level 1, see AI & Synthetics below). They can:
- Follow simple standing orders ("patrol this area," "attack hostiles," "follow me")
- React to threats (return fire, evade)
- Navigate to waypoints
They cannot make complex tactical decisions, distinguish disguised enemies from allies, or adapt to situations outside their programming. They roll their own initiative with a +0 modifier (or +2 with a Tier 3+ sensor module).
Synthetics
Synthetics are humanoid (or near-humanoid) constructs — robots, androids, and mechanical beings. They occupy a design space between drones and creatures.
Synthetic Construction
Synthetics use a simplified version of the vehicle build system. For full player-crafted synthetics with specific frame types, modifications, and detailed AI installation, see the Synthetic Construction section in the Crafting chapter.
| Component | Options |
|---|---|
| Chassis | Light (Small/Medium, 30 HP, DV 13), Standard (Medium, 50 HP, DV 14), Heavy (Medium/Large, 80 HP, DV 15) |
| Locomotion | Bipedal (30 ft), Quadrupedal (40 ft), Treaded (25 ft, ignore difficult terrain), Hover (35 ft) |
| Cognitive Level | CL 1-4 (see AI & Synthetics below) |
| Module Slots | Light: 1, Standard: 2, Heavy: 3 |
Synthetic Modules: Synthetics can install any Utility module that makes physical sense, plus these synthetic-specific options:
| Module | Effect | Cost |
|---|---|---|
| Manipulator Arms | Can handle objects, use tools, wield weapons | 200 cr |
| Integrated Weapon | One weapon built into chassis (cannot be disarmed) | weapon cost + 50% |
| Vocal Synthesizer | Can speak and mimic voices | 150 cr |
| Armor Plating | +2 DV | 400 cr |
| Self-Repair System | Regain 1d6 HP per short rest automatically | 1,000 cr |
| Sensor Suite | Darkvision 60 ft, +2 to Perception-equivalent checks | 500 cr |
| Power Cell (Extended) | 72-hour operation between charges (standard is 24 hours) | 300 cr |
Synthetic Behavior
A synthetic's behavior is determined by its Cognitive Level (see below). Lower-CL synthetics follow orders literally. Higher-CL synthetics can interpret intent, make judgments, and even develop personality quirks.
Synthetics as Party Members: A synthetic controlled by a player operates as a secondary character. It acts on its own initiative, has its own stat block, and can fill vehicle crew roles. However, it uses the controlling player's actions for complex decisions (CL 1-2) or acts independently with GM guidance (CL 3-4).
AI & Cognitive Levels
Artificial intelligence in the Ashfall ranges from simple programs to near-sentient minds. AI exists in three contexts: drone control, synthetic minds, and server-based systems.
Cognitive Levels
| Level | Label | Capability | Examples |
|---|---|---|---|
| CL 1 | Reactive | Follows explicit instructions. No initiative, no adaptation. Responds to stimuli with pre-programmed behavior. | Turret targeting system, patrol drone, automated door lock |
| CL 2 | Adaptive | Learns from patterns. Can adjust behavior within parameters. Follows complex multi-step orders. Cannot improvise. | Security system, combat drone, factory controller, vehicle autopilot |
| CL 3 | Reasoning | Problem-solving, tactical thinking, conversation. Can interpret ambiguous orders and make judgment calls. Recognizable personality. | Ship AI, synthetic companion, research assistant, settlement management system |
| CL 4 | Sentient | Fully self-aware. Has goals, preferences, and independent motivation. May refuse orders. Ethically complex. | Pre-war military AI, alien-tech synthetic, awakened machine |
AI in Drones and Synthetics
The AI's Cognitive Level determines its effective skill bonuses when acting independently:
| Cognitive Level | Skill Bonus | Actions/Round | Notes |
|---|---|---|---|
| CL 1 | +2 | 2 | Cannot adapt, follows last order |
| CL 2 | +4 | 3 | Adapts to changing conditions within parameters |
| CL 3 | +6 | 3 | Makes tactical decisions, can communicate |
| CL 4 | +8 | 3 | Fully independent, may have its own agenda |
AI Costs:
| Cognitive Level | Cost | Availability |
|---|---|---|
| CL 1 | 500 cr | Tier 2+ settlements |
| CL 2 | 2,000 cr | Tier 3+ (faction or military) |
| CL 3 | 10,000 cr | Tier 4+ (rare, require Technology DC 18 to install) |
| CL 4 | — | Cannot be purchased. Found, awakened, or quest-earned only. |
Server Infrastructure
AI can be hosted on servers — stationary systems that provide processing power, data storage, and network coordination. Servers are not vehicles but use a similar module system.
Server Frames:
| Server Type | Processing Power | Module Slots | Cost | Notes |
|---|---|---|---|---|
| Portable Terminal | CL 1 max | 1 | 200 cr | Backpack-sized, battery-powered (8 hours) |
| Local Server | CL 2 max | 2 | 1,000 cr | Room-sized, requires power connection |
| Mainframe | CL 3 max | 4 | 5,000 cr | Building-sized, requires dedicated power |
| Data Nexus | CL 4 capable | 6 | 25,000 cr | Facility-sized, pre-war technology |
Server Modules:
| Module | Effect | Cost |
|---|---|---|
| Data Storage | Store maps, schematics, records — +2 to relevant Knowledge checks when accessed | 200 cr |
| Network Hub | Control up to 4 drones/devices simultaneously from one operator | 800 cr |
| Encryption Core | All communications and stored data encrypted (DC 22 to hack) | 1,500 cr |
| Intrusion Countermeasures | Active defense against hacking — automated Hacking check at +6 | 2,000 cr |
| Remote Access Relay | Extend drone control range to 10 miles | 1,200 cr |
| Processing Upgrade | Increase max Cognitive Level by 1 (cannot exceed CL 4) | CL tier × 1,000 cr |
| Backup Core | If primary AI is destroyed, restore from backup in 1d4 hours | 3,000 cr |
Hacking Servers: Server-based AI can be attacked through the Hacking advanced skill. See Advanced Skills — Hacking for network intrusion rules. Servers with Intrusion Countermeasures make opposed checks against intruders.
Repair and Maintenance
Vehicles require maintenance and repairs following the gritty rest economy.
Combat Repairs
| Method | Time | Effect | Requirements |
|---|---|---|---|
| Damage Control | 1 action | Restore one system level | Engineering DC 14-22, 1 repair supply |
| Emergency Repair | 3 actions | Restore 2d10 + INT HP | Engineering DC 16, 2 repair supplies, 1/SR per vehicle |
Short Rest Repairs (8 Hours)
During a short rest, characters with Engineering proficiency can perform sustained repairs:
- Standard Repair: Engineering check DC 14. Restore 4d10 + INT modifier vehicle HP. Uses 4 repair supplies.
- System Restoration: Restore all Stressed systems to Operational automatically. Damaged systems require DC 16 check each.
- Module Repair: Fix a damaged module. Engineering DC 16, 2 repair supplies, 1 hour per module.
Long Rest Repairs (7 Days)
During a long rest in a settlement with a workshop or garage:
- Full Repair: Restore vehicle to full HP. Cost: 10% of vehicle's total value in parts and labor.
- Full System Restoration: All systems restored to Operational.
- Module Replacement: Swap, install, or remove modules. No check required (workshop available). Cost: module price only.
- Upgrade Tier: A vehicle can be upgraded one tier (max Tier 5 through upgrades). Cost: difference in frame price between tiers + 50% labor surcharge. Time: 7 days per tier upgraded.
Repair Supplies
Repair supplies are consumable kits containing salvaged parts, welding materials, and patch components.
| Item | Cost | Weight | Uses |
|---|---|---|---|
| Basic Repair Kit | 50 cr | 5 lbs | 4 uses |
| Military Repair Kit | 200 cr | 10 lbs | 8 uses |
| Master Repair Kit | 500 cr | 15 lbs | 12 uses, +2 to Engineering checks |
Fuel
Most vehicles require fuel. Fuel consumption varies by vehicle size and tier.
| Vehicle Size | Fuel per Hour | Fuel Cost (per unit) |
|---|---|---|
| Personal | 1 unit | 5 cr |
| Light | 2 units | 5 cr |
| Medium | 4 units | 5 cr |
| Heavy | 8 units | 5 cr |
| Massive | 16 units | 5 cr |
Fuel Capacity: Vehicles carry enough fuel for 8 hours of standard operation. Extended fuel tanks (utility module, 200 cr) double capacity to 16 hours.
Fusion Drives (Tier 5 engine) require no fuel — they run on self-sustaining reaction for years.
Vehicle CR and Encounter Building
Vehicles have CR values for encounter building, integrated with the existing CR budget system (see Game Mastering).
Vehicle CR Calculation
| Size | Tier 1 CR | Tier 2 CR | Tier 3 CR | Tier 4 CR | Tier 5 CR |
|---|---|---|---|---|---|
| Personal | 1 | 2 | 3 | 4 | 5 |
| Light | 2 | 3 | 5 | 7 | 9 |
| Medium | 4 | 6 | 8 | 11 | 14 |
| Heavy | 7 | 10 | 14 | 18 | 22 |
| Massive | 12 | 16 | 22 | 28 | 35 |
CR Adjustment: Add +1 CR for each weapon module beyond the first. Add +1 CR if crew includes a Commander with Tactics proficiency.
Encounter Design with Vehicles
PCs in Vehicles vs Enemies on Foot: Reduce the CR budget by 25%. Vehicles give PCs significant advantages in mobility and firepower.
PCs on Foot vs Enemy Vehicles: Increase the CR budget by 25%. Ensure the environment provides cover and opportunities for PCs to disable vehicles (target wheels/treads, use terrain to block).
Vehicle vs Vehicle: Use standard CR budgets. Balance by matching total vehicle CR to the encounter difficulty tier.
Mixed Encounters (vehicles + infantry): Combine vehicle CR and creature CR normally. Vehicles + infantry supporting them are more dangerous than either alone — consider reducing the total budget by 10%.
Class Feature Synergies
Certain class features interact with vehicle operations. These features are always superior to skill-only alternatives — a class-trained character is better in their specialty than a generalist with the same skill.
Warrior
- Mounted Combat (L3): Extends to vehicles. When operating as Pilot, add MIG modifier to ram damage. Vehicle DV increases by +1 when you are Pilot.
- Battlemaster (L6 Warlord): Issue Orders as a bonus action instead of a full action when serving as Commander. Coordinate affects all crew instead of two.
Gunslinger
- Sharpshooter (L1): Applies to vehicle-mounted weapons. Ignore long range disadvantage on mounted weapons.
Technician
- Drone Commander: Command 2 drones with 1 action. Drones gain +2 to all checks.
- Field Engineer (L3): Advantage on all Engineering checks for vehicles. Damage Control restores 2 system levels instead of 1.
- Master Craftsman (L6 Artificer): Build vehicles at 75% cost. Field Modifications take half time. Can upgrade vehicles by 2 tiers during long rest (normally max 1).
Operative
- Infiltrator (L6 Spy): Advantage on Piloting checks for stealth approaches. Can hack vehicle systems remotely (requires line of sight and Hacking skill).
Medic
- Triage (L3): Can perform Emergency Field Medicine on crew members inside a moving vehicle without the normal combat DC increase.
Diplomat
- Inspiring Leader (L1): Rally Crew as Commander grants temporary HP (1d6 + PRE modifier) in addition to normal effects.
Channeler
- Divine Protection (L3): Extends protective auras to vehicle crew (all crew within the vehicle count as within 30 ft).
Mystic
- Arcane Ward (L1): Can extend Arcane Ward to cover a vehicle's hull. The ward provides temp HP to the vehicle equal to twice the normal amount.
Sample Vehicles
Tier 1 — Salvaged
Rust Runner (Personal Ground, Tier 1)
- Frame: Cycle (200 cr)
- Stations: 1 (Pilot)
- HP: 20 | DV: 12 | Speed: 60 ft
- Modules: Scrap Engine (100 cr)
- Total: 300 cr | CR: 1
- A cobbled-together motorcycle held together by wire and prayer. Stalls on natural 1 Piloting checks.
Tier 2 — Functional
Dust Devil (Light Ground, Tier 2)
- Frame: Car/Truck (1,000 cr)
- Stations: 2 (Pilot, Gunner)
- HP: 50 | DV: 15 | Speed: 50 ft | Passengers: 0
- Modules: Reinforced Plating (+2 DV, 400 cr), Turret MG (2d8, 900 cr)
- Total: 2,300 cr | CR: 3
- A battered four-wheeler with a jury-rigged turret. The go-to raider vehicle.
Buzzard (Personal Flight, Tier 2)
- Frame: Hover Drone (300 cr × 2 = 600 cr)
- Stations: 1 (Pilot — remote operator)
- HP: 25 | DV: 12 | Speed: 50 ft hover
- Modules: Sensor Array (+2 Navigation, 500 cr)
- Total: 1,100 cr | CR: 2
- A recon drone with enhanced sensors. Ideal for scouting ahead.
Tier 3 — Military
Ironclad (Medium Ground, Tier 3)
- Frame: APC (8,000 cr)
- Stations: 3 (Pilot, Navigator, Gunner)
- HP: 120 | DV: 17 | Speed: 40 ft | Passengers: 8
- Modules (5): Standard Engine, Composite Armor (+3 DV, DR 5), Turret MG (2d8), Stabilization System, Passenger Seats (×4)
- Compartments (1): Armory (800 cr)
- Total: ~15,600 cr | CR: 9
- A pre-war armored personnel carrier restored to fighting condition. The Navigator watches the sensor display while the squad gears up from the onboard armory. Eight passengers ride with stable firing positions.
Stormhawk (Medium Flight, Tier 3)
- Frame: Shuttle (12,000 cr)
- Stations: 3 (Pilot, Navigator, Gunner)
- HP: 120 | DV: 14 | Speed: 50 ft flight | Passengers: 4
- Modules (5): Performance Engine (+10 ft), Missile Rack (3d10), Mounted MG (2d8), Sensor Array, Fire Suppression
- Compartments (1): Cargo Hold (500 cr)
- Total: ~19,900 cr | CR: 10
- An atmospheric shuttle retrofitted for combat. The Navigator plots evasive courses while the Gunner switches between missiles and machine gun. Fast and heavily armed but lightly armored.
Tier 4 — Advanced
Leviathan (Heavy Ground, Tier 4)
- Frame: Tank (64,000 cr)
- Stations: 5 (Pilot, Navigator, Gunner ×2, Engineer)
- HP: 300 | DV: 19 | Speed: 50 ft | Passengers: 8
- Modules (7): Military Turbine (+20 ft), Reactive Armor (+3 DV, DR 5), Heavy Cannon (4d12), Point Defense System, Turret MG (2d8), Encrypted Comms, Stabilization System
- Compartments (3): Engine Room (3,000 cr), Armory (800 cr), Crew Quarters (400 cr)
- Total: ~86,700 cr | CR: 20
- A fully restored pre-war main battle tank. Two Gunners operate the heavy cannon and turret MG while the Engineer works from a dedicated engine room, keeping the turbine running hot. The Navigator feeds targeting data from encrypted sensor feeds. The crew sleeps aboard between engagements.
Tier 5 — Experimental
Wraithblade (Heavy Flight, Tier 5)
- Frame: Dropship (240,000 cr)
- Stations: 5 (Pilot, Navigator, Gunner ×2, Engineer) + 1 extra Communications (400 cr, 1 module slot)
- HP: 375 | DV: 20 | Speed: 60 ft flight | Passengers: 12
- Modules (7): Fusion Drive (+30 ft, unlimited fuel), Hardlight Barrier (+4 DV, DR 10 energy), Energy Lance (5d8), Railgun (4d10), Advanced Sensors, Stealth System, Escape Pods
- Compartments (3 + 1 from Tier bonus): Crew Quarters (400 cr), Medical Bay (1,500 cr), War Room (1,200 cr), Shield Generator Room (4,000 cr)
- Total: ~300,000+ cr | CR: 25
- An experimental dropship recovered from a pre-war black site. Six crew operate in concert — the Pilot flies silent while the Navigator feeds sensor ghosts to the Comms Officer, who spoofs enemy IFF codes. Two Gunners man the energy lance and railgun while the Engineer monitors the fusion drive from amidships. Between missions, the Commander plans operations in the war room. The stuff of wasteland legends.
Quick Reference
Vehicle Combat Checklist
- Roll Initiative — Each crew member rolls individually
- Declare Roles — Each crew member picks a station (Pilot, Navigator, Gunner, Engineer, Commander, Communications)
- Act on Turn — 3 actions + 1 reaction per crew member, using role actions OR open actions
- Track System Damage — Update damage track as vehicles take HP damage
- Cascade Failures — At Critical status, roll on Cascade Failure table each round
- Resolve Ram/Collision — When vehicles collide, resolve damage to both
Chase Encounter Checklist
- Set Starting Range — GM determines range band (Engaged/Close/Medium/Far/Extreme)
- Roll Complication — GM rolls or chooses from Complication Table
- Act on Turn — Standard initiative, crew use role + chase-specific actions
- Chase Check — End of round, opposed Piloting checks (+ speed advantage). Winner shifts range 1 band
- Check Escalation — After round 3, complications increase DC by +2
- Resolution — Pursuer wins at Engaged (2 rounds). Quarry wins past Extreme
Crew Role Summary
| Role | Primary Skill | Key Actions | Best For |
|---|---|---|---|
| Pilot | Piloting | Drive, Combat Maneuver, Evasive Action | AGI/INT characters |
| Navigator | Navigation | Plot Course, Scan, Countermeasures | WIS/INT characters |
| Gunner | Weapon Systems | Fire Weapon, Aimed Shot, Suppressive Fire | INT/WIS characters |
| Engineer | Engineering | Damage Control, Reroute Power, Emergency Repair | INT characters, Technicians |
| Commander | Tactics/Persuasion | Issue Orders, Coordinate, Rally Crew | INT/WIS/PRE characters, Diplomats |
| Communications | Technology/Persuasion | Broadcast, Intercept, Jam Signal | INT/PRE characters |
Open Actions (Any Role)
| Action | Effect |
|---|---|
| Personal Attack | Fire personal weapon (disadvantage if vehicle moved) |
| Assist Crew Member | +2 to one crew member's next check |
| Put Out Fire | Extinguish fire in your section (DC 14) |
| Patch Breach | Seal hull breach for 1d4 rounds (DC 14) |
| Emergency Aid | Stabilize dying crew member or administer stim (DC 15) |
| Spot Threat | Perception check to detect hidden threats |
| Brace Bulkhead | −2 damage from next attack on braced direction |
| Grab the Helm | Emergency Drive if Pilot is down |
| Cast a Spell | Use magic as normal from within vehicle |
Station & Compartment Quick Reference
| Size | Stations | Compartments | Passengers |
|---|---|---|---|
| Personal | 1 | — | — |
| Light | 2 | — | 0-2 |
| Medium | 3 | 1 | 4-8 |
| Heavy | 5 | 3 | 8-20 |
| Massive | 7 | 6 | 20-100+ |
System Damage Quick Track
[■■■■] Operational (100-76%) — No penalties
[■■■□] Stressed (75-51%)     — -2 all checks
[■■□□] Damaged (50-26%)      — -4 all checks, ½ speed, 1 system down
[■□□□] Critical (25-1%)      — -6 all checks, ¼ speed, 2 systems down, cascade failures
[□□□□] Disabled (0%)         — Inoperable, evacuate!
Chase Range Bands
[ENGAGED]  0-30 ft    — Boarding, ramming, all weapons, melee possible
[CLOSE]    30-200 ft  — All weapons, personal weapons viable
[MEDIUM]   200-1K ft  — Mounted weapons only, long range penalties
[FAR]      1-5K ft    — Long-range weapons only (missiles, railguns)
[EXTREME]  5K+ ft     — Sensors only, one more Disengage = escape
Boarding Methods Quick Reference
| Method | Check | Actions |
|---|---|---|
| Jump Across | DC 16 Athletics/Acrobatics | 1 action |
| Grapple Line | DC 14 Athletics | 2 actions (attach + cross) |
| Breach Hull | DC 18 MIG/Demolitions | 2 actions |
| Docking Clamp | DC 14 Piloting | 1 action (locks vehicles) |
Module Slot Quick Reference
| Size | Base Slots | + Tier 3-4 | + Tier 5-6 |
|---|---|---|---|
| Personal | 1 | 2 | 3 |
| Light | 2 | 3 | 4 |
| Medium | 4 | 5 | 6 |
| Heavy | 6 | 7 | 8 |
| Massive | 10 | 11 | 12 |